Tuesday, December 28, 2010

Belgian Waffles

These waffles are honestly out of this world. They are thick and soft and have just the right amount of sweetness that tastes amazing with just about anything - buttermilk syrup, fresh strawberries or peaches, butter and jam and anything else you can create. They are super easy to make and use common ingredients found in any pantry. My husband loves these with chocolate chips and they also make the perfect fall treat with a dash of cinnamon and fresh cut apples inside. (Recipe and picture courtesty of Taste of Home)


Ingredients:

  • 2 c. all-purpose flour
  • 3/4 c. sugar
  • 3 1/2 tsp. baking powder
  • 2 eggs, separated
  • 1 1/2 c. milk
  • 1 c. butter, melted (2 cubes)
  • 1 tsp. vanilla extract

In a bowl, combine flour, sugar and baking powder. In another bowl, lightly beat egg yolks. Add milk, butter and vanilla and mix well. Stir into dry ingredients just until combined. Beat egg whites until stiff peaks form; fold into batter. Bake in a preheated waffle iron according to manufacturer's directions until golden brown. Serve.

Monday, December 27, 2010

Marshmallow Breakfast Rolls

15 minutes and four simple ingredients: that's all it will take to whip these babies up for a last minute get-together, dessert or quick breakfast in the morning. These are super easy and are loved by kids and adults alike. Warm, soft cinnamon crescent rolls cover gooey marshmallows that literally melt in your mouth and make for a perfect treat. (Picture courtesy of My Sisters' Cucina)


Ingredients:

  • 1 Pkg. refrigerated crescent rolls
  • Marshmallows, big
  • 3 Tbsp. butter, melted
  • Cinnamon-sugar mix (1/2 c. sugar to 1/2 tsp. cinnamon)

Separate rolls and place one marshmallow in the center of each one. Wrap tightly around marshmallow and roll in melted butter, then in the cinnamon-sugar mix. Place on greased cookie sheet and bake according to crescent roll package directions.

Honey Mustard Glazed Chicken

I often go on "healthy cooking" streaks where I search to find healthy recipes that are still delicious. I came across this recipe from Mindika Moments about a year ago that fits perfectly into my healthy and delicious category. I love the sweet and tangy flavor of the honey-mustard sauce and it pairs perfectly with a side of cooked vegetables and brown rice. It is also extremely easy to throw together which is a big bonus when I get home late from work and don't feel like doing much for a good meal. Healthy, delicious and easy.. what could be better than that? (Picture courtesy of Mindika Moments)

Ingredients:

  • 5 Tbsp. dijon mustard
  • 3 Tbsp. honey
  • 1 Tbsp. brown sugar
  • 1/4 tsp. dried thyme
  • 4 boneless, skinless chicken breasts
  • salt and pepper to taste

Pre-heat oven to 350 degrees. In a small bowl, mix together mustard, honey, brown sugar and thyme until combined. Divide in half and set one-half aside. Season the chicken with salt and pepper and place in a 9x13 pan, sprayed with cooking spray. Brush with half of the honey-mustard sauce. Cover with foil and bake for 30 minutes. Turn over the chicken breasts and baste again with some more sauce. Return to the oven and cook for an additional 15-20 minutes or until cooked through. Use the reserved sauce to drizzle over the top of the chicken or use as dipping sauce.

Shrimp & Grits with Creamy Corn Sauce

So I'm a little embarrassed to admit that up until I had met my husband, I had never in my life tried grits of any form, flavor or style. My husband made them for me for breakfast one morning while we were dating and I loved them!! Then I moved to Tennessee and realized that grits are a staple here that everybody eats and loves. There is even an entire section dedicated to grits in the grocery store - it's a serious thing, folks. My parents came to visit a few months ago and we all went down to the Smoky Mountain National Park and ate at a little restaurant called "Miss Lily's Cafe," where I was first introduced to the classic dish: Shrimp and Grits. Let's just say I fell in love. The grits were so soft and smooth and were dotted with a few jumbo-sized shrimp smothered in a creamy, cheesy corn sauce. Needless to say, the cravings for my new-found love came within a few short weeks after leaving the Smokies and I was determined to find a way to duplicate the recipe. Although it's not exactly the same, it is pretty darn good and tastes incredible on a cold night. If you're like me and have a very limited experience with grits, let this be your first dish to try. I guarantee it will become a staple in your pantry just like it is in mine. Enjoy! (Picture courtesy of Gluten-Free Food Recipes)

Ingredients:
  • 2 servings grits, cooked according to package directions (I cook mine with chicken broth instead of water to give it more flavor)
  • 2 1/2 lbs. large shrimp, peeled and deveined
  • 2/3 c. heavy cream
  • 2 Tbsp. butter
  • 1 tsp. salt
  • 1 tsp. pepper
  • 1/2 c. canned corn
  • one pinch of red pepper flakes
  • 2 Tbsp. worcestershire sauce
  • 1 cup sharp cheddar cheese, shredded
  • Dash of hot pepper sauce

While grits are cooking, heat heavy cream, butter, salt and pepper together in a medium-sized skillet of medium-high heat. When cream begins to boil, add in the corn, red pepper flakes, worcestershire sauce, cheese and hot pepper sauce. Reduce heat to medium-low and simmer until cheese is melted and sauce ingredients are combined. Add in shrimp and cook until pink and firm. Serve grits in a bowl and pour cream sauce over top.

Tip: If shrimp are already cooked, add them into the sauce at the very end for about a minute, or until they are heated through.

Steak with Onion-Blue Cheese Sauce


This sauce will change your life. I'm not exaggerating or being sarcastic in any way, either! Even if you're not a blue cheese fan, I'm begging you to just try it!! Some good steaks don't need sauce, but if you want to try something different and absolutely phenomenally delicious, try this! It is thick, creamy, and so savory that you won't be able to stop eating it. It pairs perfectly with a seasoned steak right off the grill, and is also amazing as a dip for crusty bread or rolls. I have made it several times for my husband and I, as well as for guests, and each time I taste it, I honestly want to cry. It is that good. (Recipe and picture courtesy of The Pioneer Woman.)

Ingredients:

  • 2 whole ribeye steaks
  • 2 Tbsp. butter
  • Salt
  • Pepper
  • 4 Tbsp. butter
  • 1 large onion, diced
  • 1 cup heavy cream
  • 1/2 cup crumbled blue cheese

Salt and pepper both sides of the steaks. Grill in 2 Tbsp. butter until cooked to your liking (medium-well is my favorite). Saute onions in 4 Tbsp. butter over high heat for 5-7 minutes, or until dark and caramelized. Reduce heat to simmer and pour in cream. Cook for 3-5 minutes, or until reduced by half. Stir in blue cheese until melted. Serve a generous portion of sauce over steaks.

Wednesday, December 22, 2010

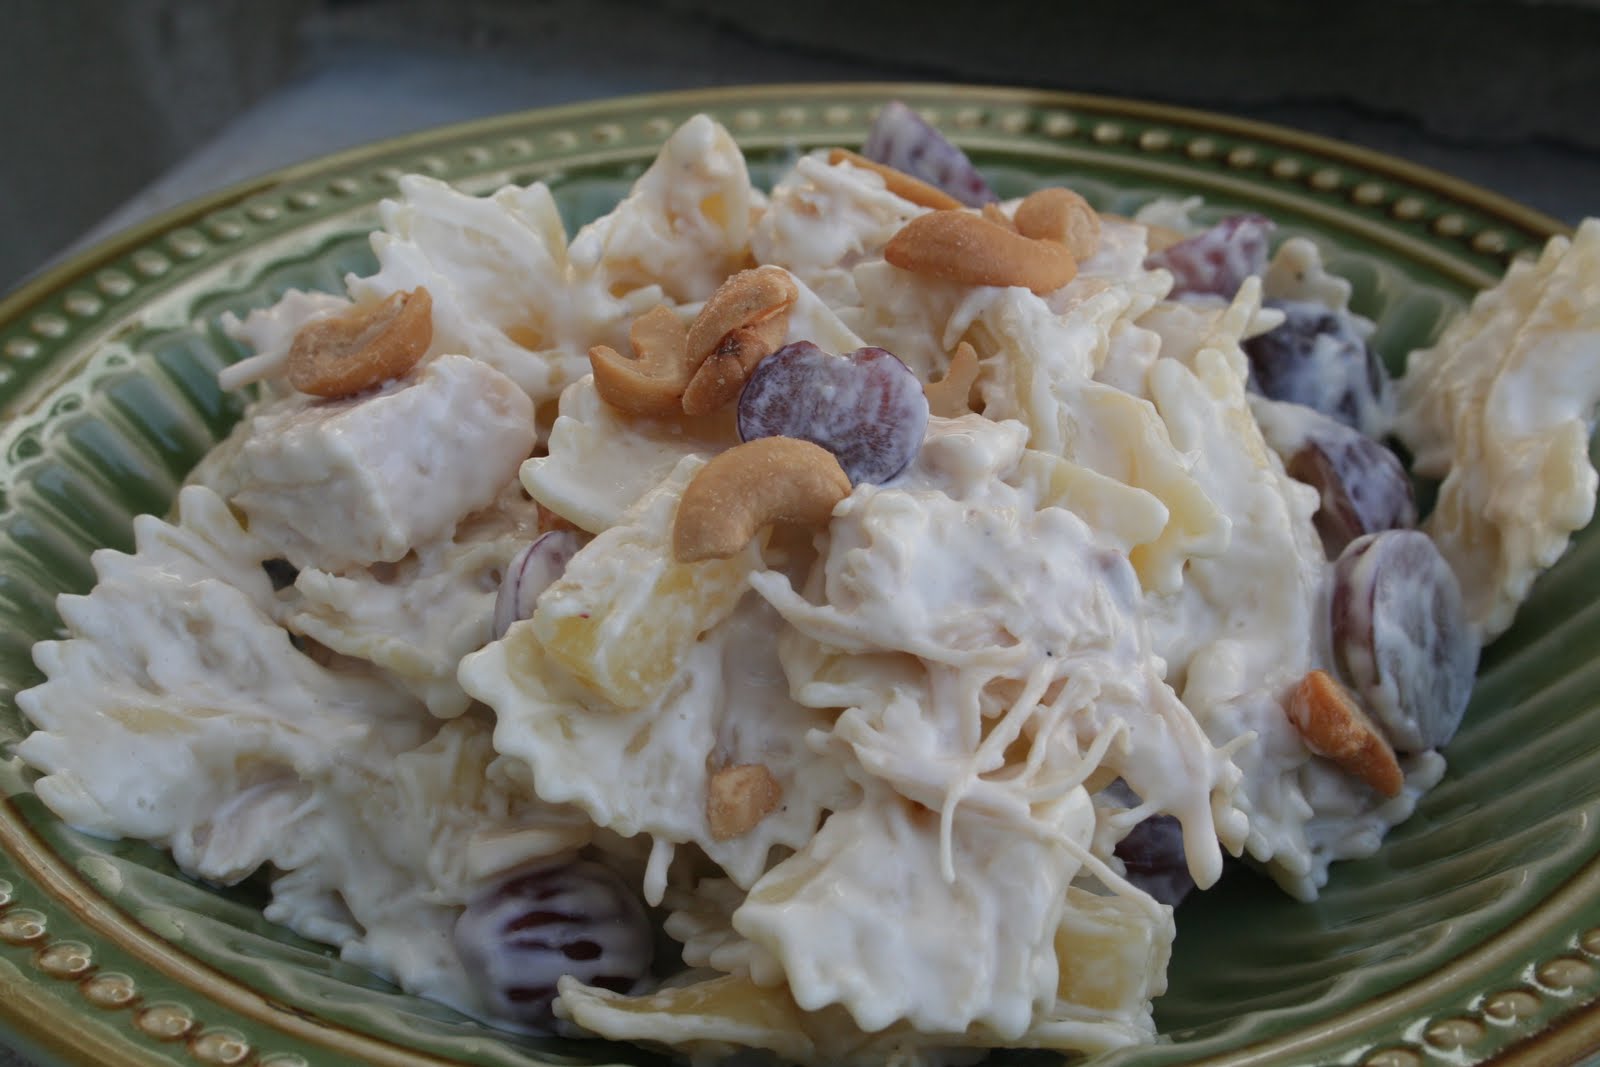
BowTie Chicken Pasta Salad

This is yet another amazing recipe my mom used to make growing up. I have made it several times for various events and I continually get rave reviews. This pasta salad is unbelievably simple, but so delicious. It is definitely my go-to recipe for potlucks, church parties, baby/bridal showers and any type of summer meal. The variety of ingredients make for a colorful and eye-catching display, and the creamy sauce pulls everything together perfectly. (Picture courtesy of Oh Sweet Basil)

Ingredients:
  • 1 16-oz. box bow-tie pasta noodles, cooked and drained (any type of medium-sized noodle would work well here)
  • 1-2 cups cooked chicken, diced
  • 2 cups red or purple grapes, sliced in half
  • 1 large can mandarin oranges
  • 1 large can pineapple tidbits
  • 1 can water chestnuts, sliced in half
  • 2-3 green onions, diced in small pieces
  • 1 cup cashews

Dressing:

  • 1/2 bottle Kraft Coleslaw salad dressing
  • 1 cup mayonnaise

Toss all salad ingredients together in a large bowl until combined. Mix coleslaw dressing and mayonnaise together and pour over pasta salad, stirring until evenly coated. Serve immediately or store in fridge until needed.

Cream Cheese Enchiladas

I know I just posted my favorite enchilada recipe a few weeks ago, but I was having a craving for enchiladas last night and wanted to try something new. I found this recipe on My Kitchen Cafe and immediately knew I had to give it a try. Although not the healthiest of meals, it is absolutely delicious. The biggest difference between my go-to enchilada recipe is the filling. This one had a cheesy cream cheese base and an addition of black beans. It was a cinch to throw together in a bowl and stuff into the tortillas. The sauce was also incredible! I definitely think I'll be using this sauce from now on, no matter what enchilada recipe I use. It was so rich and creamy and it added a huge pop of flavor to the simple filling. Top it all off with fresh cilantro and Mmm baby! You can't go wrong! (Picture and recipe courtesy of My Kitchen Cafe)


Ingredients:

Filling:

  • 2-3 cups cooked chicken, diced
  • 2 cans diced green chilies
  • 1 8-oz container cream cheese, softened
  • 1 can black beans, rinsed and drained (you can really use any type of bean here)

Sauce:

  • 2 Tbsp. butter
  • 1/2 c. chopped onion
  • 2 Tbsp. flour
  • 1/3 c. chicken broth
  • 1/4 c. milk
  • 1/4 tsp. salt
  • 1/4 tsp. pepper
  • 1 can (7 oz.) green enchilada sauce
  • 1/2 c. sour cream

5-8 flour tortillas

Toppings: grated cheese, cilantro, salsa, hot sauce, etc.

In a medium bowl, combine all ingredients to make up the filling. Fill each tortilla with several spoonfuls of the filling and roll up. Lightly grease a 9x13 baking dish and place tortillas seam-side down inside.

In a large nonstick skillet, saute the onions and butter over medium heat until onions are soft and light golden brown. Sprinkle the flour over the onions and stir well until combined. Slowly, whisk in the chicken broth and milk. As you whisk and the mixture cooks, it will become less lumpy and will thicken - about 3-4 minutes. Remove the skillet from the heat and stir in the salt, pepper, enchilada sauce, and sour cream until smooth. Pour over the top of the enchiladas. Top with cheese. Cover the pan with foil and bake at 350 for 20-30 minutes, or until heated through. Sprinkle fresh cilantro over the top and serve.

Monday, December 20, 2010

Swiss Steak


I'll have to say that my favorite kitchen appliance is definitely my crock pot. I love throwing everything in, turning on the heat, and walking away for a few hours, only to come back to a mouth-watering smell and cooked food! A big shout-out to whoever invented this little guy- I. Love. It. Moving on, this is one of my favorite crock-pot recipes of all time! Although I love the original flavor of a Sunday roast, this one is a refreshing change and is sure to please everyone around the table. At first I was a little skeptical to try a roast recipe that included canned tomatoes, but they provided so much moisture and just the right amount of sweetness. And the best thing is, it is extremely versatile. Just add in whatever ingredients you have, wait a few hours, and voila! You have a wonderful, heart-warming meal ready to serve. (Picture courtesy of Better Homes and Gardens)

Ingredients:
  • 1 medium-size pot-roast, OR 1 lb. boneless beef round steak
  • 3-4 large carrots, cut into small 1-inch pieces
  • 1 medium onion, diced
  • 2-3 small potatoes, cut into 1-inch cubes
  • 1 14.5 ounce can Italian-style diced tomatoes, undrained
  • 2 Tbsp. worcestershire sauce
  • 1 clove garlic, minced
  • Salt and pepper to taste

Lay meat on bottom of the crock pot and sprinkle with carrots, onions, and potatoes. Pour tomatoes, worcestershire sauce and garlic over everything. Cover and cook on low for 6-8 hours, or on high for 3-4 hours, or until meat is tender and cooked through. Serve and add salt and pepper to taste.

Optional: Omit the potatoes and serve over mashed potatoes, rice, or cooked pasta noodles.

Monday, December 13, 2010

How to make Chocolate Curls

Despite what you might think, chocolate curls are one of the easiest and quickest things to throw together to decorate a cake, cupcakes, pie, or any other dessert you can come up with! Here's the easy step-by-step version:

Place 3 ounces of chocolate in a microwave safe bowl and microwave on high for 30 seconds. Stir chocolate and put in for another 20 seconds and stir again until chocolate is smooth and creamy. Grab a metal cooking sheet, turn it upside down, and pour the melted chocolate on. With a flat spatula (or a knife) spread the chocolate into a thin layer. Stick it in the freezer for a few minutes. Get a sharp-edged spatula and begin to scrape the chocolate from the pan. When the chocolate is at the right temperature it will begin to curl instead of break. If it does break off into little pieces, simply wait a few minutes for the chocolate to soften and try again. Scrape along the bottom of the pan until it is all in beautiful curls! Store in the freezer in a Ziploc bag until you need them. So simple, but so fancy!!

The BEST Frosting Recipe


So not to offend anyone, but I abhor the greasy, sugary taste and texture of buttercream frosting.. I know, I know-I'm a horrible person, but I really do. So when I saw this recipe that didn't require any powdered sugar, I knew it would be amazing. If you haven't seen the new frosting-with-flour craze that's swept across cooking blogs, then here it is! I made the chocolate version and put it on a chocolate-raspberry cake I made for my work Christmas party yesterday and I promise you that cake was gone by the end of the day. But just to give you a heads-up: this frosting takes a LONG time to make. Unlike the quick throw-it-in and whip-it-up version of regular frosting, this one requires boiling, cooling, and mixing that took me about 2 hours to make. But I promise you it is completely worth it! Trust Merideth on this one.. I know you'll love it!! (Picture courtesy of Taste of Home- I forgot to take a picture of the cake I made, but it looked just like this one with the raspberries, chocolate curls, and mint leaves- presentation is everything! :) )

*Makes about 4 cups of frosting- plenty for two 9-inch cake layers

Ingredients:
  • 1 1/2 cups granulated sugar
  • 1/4 cup all-purpose flour
  • 3 Tbsp. cornstarch
  • 1/4 tsp. salt
  • 1 1/2 cups milk
  • 2 tsp. pure vanilla extract
  • 24 Tbsp. (3 sticks) butter, softened to room temperature.

In a medium bowl, combine the sugar, flour, cornstarch and salt. Slowly whisk in the milk until the mixture is smooth. Place a fine-mesh strainer over a medium saucepan and pour the milk mixture through the strainer into the saucepan. Cook the mixture over medium heat, stirring constantly, until the mixture boils and is thick enough that it becomes difficult to stir with a whisk (5-10 minutes). It should bubble quite a bit at the end and thicken considerably.

Transfer the mixture to a clean bowl and cool to room temperature - this is extremely important! If it is even slightly warm it will not mix with the butter well and won't turn out correctly. I stuck mine in the refrigerator for an hour and then took it out and allowed it to return to room temperature again.

Once the mixture is completely cooled to room temperature, beat the frosting with the vanilla on low-speed until it is well combined, about 30 seconds. Cut up the butter into small pieces and add, one piece at a time, until completely combined - about 2 minutes. Increase the speed to medium-high and whip the frosting for 5 minutes- until it is light and fluffy. Let the frosting sit at room temperature until it is a bit more stiff- about an hour.

Chocolate Version: Add 1/4 cup cocoa powder to the sugar, flour, cornstarch and salt in the first step. Optional: Once the frosting has been whipped for 5 minutes, slowly pour in 3 ounces of chocolate that has been melted and cooled to room temperature.